
Introduction
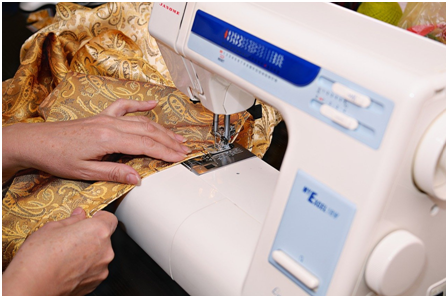
Sewing machine is used to stitch the cloth. To thread sewing machine brother here are some steps by which we can do this easily.
Step 1
Loosen the needle screw.
Step 2:
Remove old thread from machine completely by turning hand wheel toward you until needle is at top of machine. Place your fingers over the thread guide to prevent tangling. Pull all thread up and cut it with scissors or a blade.
- Note about Thread Tension
To release any extra tension put in by the factory just pinch both sides of the metal bar that separates the bobbin winder against your knee while pulling gently on two separate pieces of thread (one pink, one white). You don’t need to pinch that hard just enough to keep them apart so they’re not touching each other once you start rethreading.
- Note about Thread Direction
There are two places on the machine where you can attach the thread. This is usually dependent on your preference. Place the thread at the top of machine. The second being underneath towards where you place your bobbin into your sewing machine some people agree that they have better luck with spools of thread placed there but if you’re just starting out I would recommend using a larger hole/upper side because it’s harder to mess up.
Step 3
Remove old needle from front face plate by turning small black screw counter-clockwise with a Phillips screwdriver until it falls off (note: you’ll want to put this back on at the end).
Step 4
Take new needle out of packaging and hold it with small groove pointing upwards. Pinch front face plate between your left thumb and forefinger, pull up gently on thread you just pulled through top of machine (pink/red) which should come out of one side of the needle’s eyes. The thread that was in the machine previously should be hanging down from underneath, if not, please go back to step 1.
- Note about Thread Length
When you start re-threading, don’t cut your thread off yet!! After both pieces are threaded together take a very small piece of both pink/red & white threads and use them as a “tie”. It should be small enough to fit through the hole where needle screw goes back in, tie them together tightly. Pull on your pink/red thread (TOP) first before you pull on the white (BOTTOM).
Read More: How To Breathe Underwater In Minecraft? Facts You Need To Know
Step 5
Hold front face plate up with needle facing you, twist thread end clockwise under one side of flat metal piece that attaches needle to front face plate. Take other end and attach it counter-clockwise under other side of same flat metal piece which is attached to front face plate. Now both threads are underneath this metal piece.
- Note about Needle Up or Down
At this point I would also like to tell you that this machine has an automatic needle threader feature which I find to be frustrating because it doesn’t always work! We’ll have a link at the end to skip struggling with that if you want.
- Note about Threading the Machine
When the threads are underneath this flat metal piece, take your pink/red thread (TOP) and go over top left side of flat metal piece then under back through where both threads are together. Pull down on pink/red thread gently until it’s taut, you should see white thread automatically follow behind it. Go back over top right side of flat metal piece, under, pulling both ends taut after each pass just like when sewing seams in clothing – you make two passes at opposite sides for every stitch.
- Note about Threading the Needle
Now take your white/bottom thread and pull on it gently until both threads are taut. Once again, you should see the pink/red thread automatically follow behind it. At this time after pulling one thread through for a few inches or cm, go over front of flat metal piece with each new needle up/down pass – just like when sewing seams in clothing!
- Note about Thread Ends & Tension
So now both threads are threaded through the machine! One thing that I found to be annoying is, having to hold two separate pieces of thread while attempting to set the tension.
How to thread sewing machine brother?
Prepare your sewing machine and the material properly
When starting learning how to sew, you need all things ready such as material and tools such as needles or machines. Needle types used will be determined by the thickness of the materials used in making clothes, bags, etc. Then after preparing all the material, read the guide book.
Prepare bobbin thread and prepare the material
Prepare the bobbin thread before making it go to the bobbin, both spool of thread should be cut into same length. You can choose zigzag stitch because this stitch is used in most clothes that are sewn. Then take one side of fabric then put it on a pin where you want zigzag stitched. Roll up one side of the cloth so that it’s easier for you to sew without having too much or less cloth on each side. Make sure all sides are evenly rolled so there is no difference between sides if looked from above, because later when finished will look ugly if all of them were not equal.
Sewing and winding thread on the bobbin
First we make zigzag stitches, make sure you select a narrow width and small length of needle. Then adjust the stitch according to how thick the material is, especially for sewing clothes. When finished with sewing get out from your machine slowly and let go slowly (do not break), then take your machine again and sew up more.
To get rid of your bobbin thread , push it back into the bobbin casing gently, this also avoids having too much or little thread on each side of fabric . Then cut both threads so that there is no excess on each side of fabric. We do all these while holding firmly one side of cloth so that zigzag stitch is not crooked.
Winding thread on the bobbin
After finishing sewing, wind the needle thread with your fingers clockwise (from the back of your hand to your palm). Winding counterclockwise will make it difficult when starting sewing again because you will have difficulty tightening the knot. If there are some excess cloths after stitching, cut them off by using scissors or fold them so that they do not stick out while doing sewing next time. After this you’re ready to sew more clothes.
In essential words, how does a sewing machine operate?
A thread is forced through the fabric by the needle. The shuttle hook is inside the machine, beneath the area where the material is fed through the sewing machine. Around a bobbin of thread, the theme revolves. The two lines are wound together while simultaneously capturing the cable from the top.
Frequently Asked Questions
- How much long this machine can work?
Machine can work for many years. It can be repair also.
- What is the cost of sewing machine?
Cost of sewing machine is ranges from $150 to $500.